Create a Cloudflare Tunnel
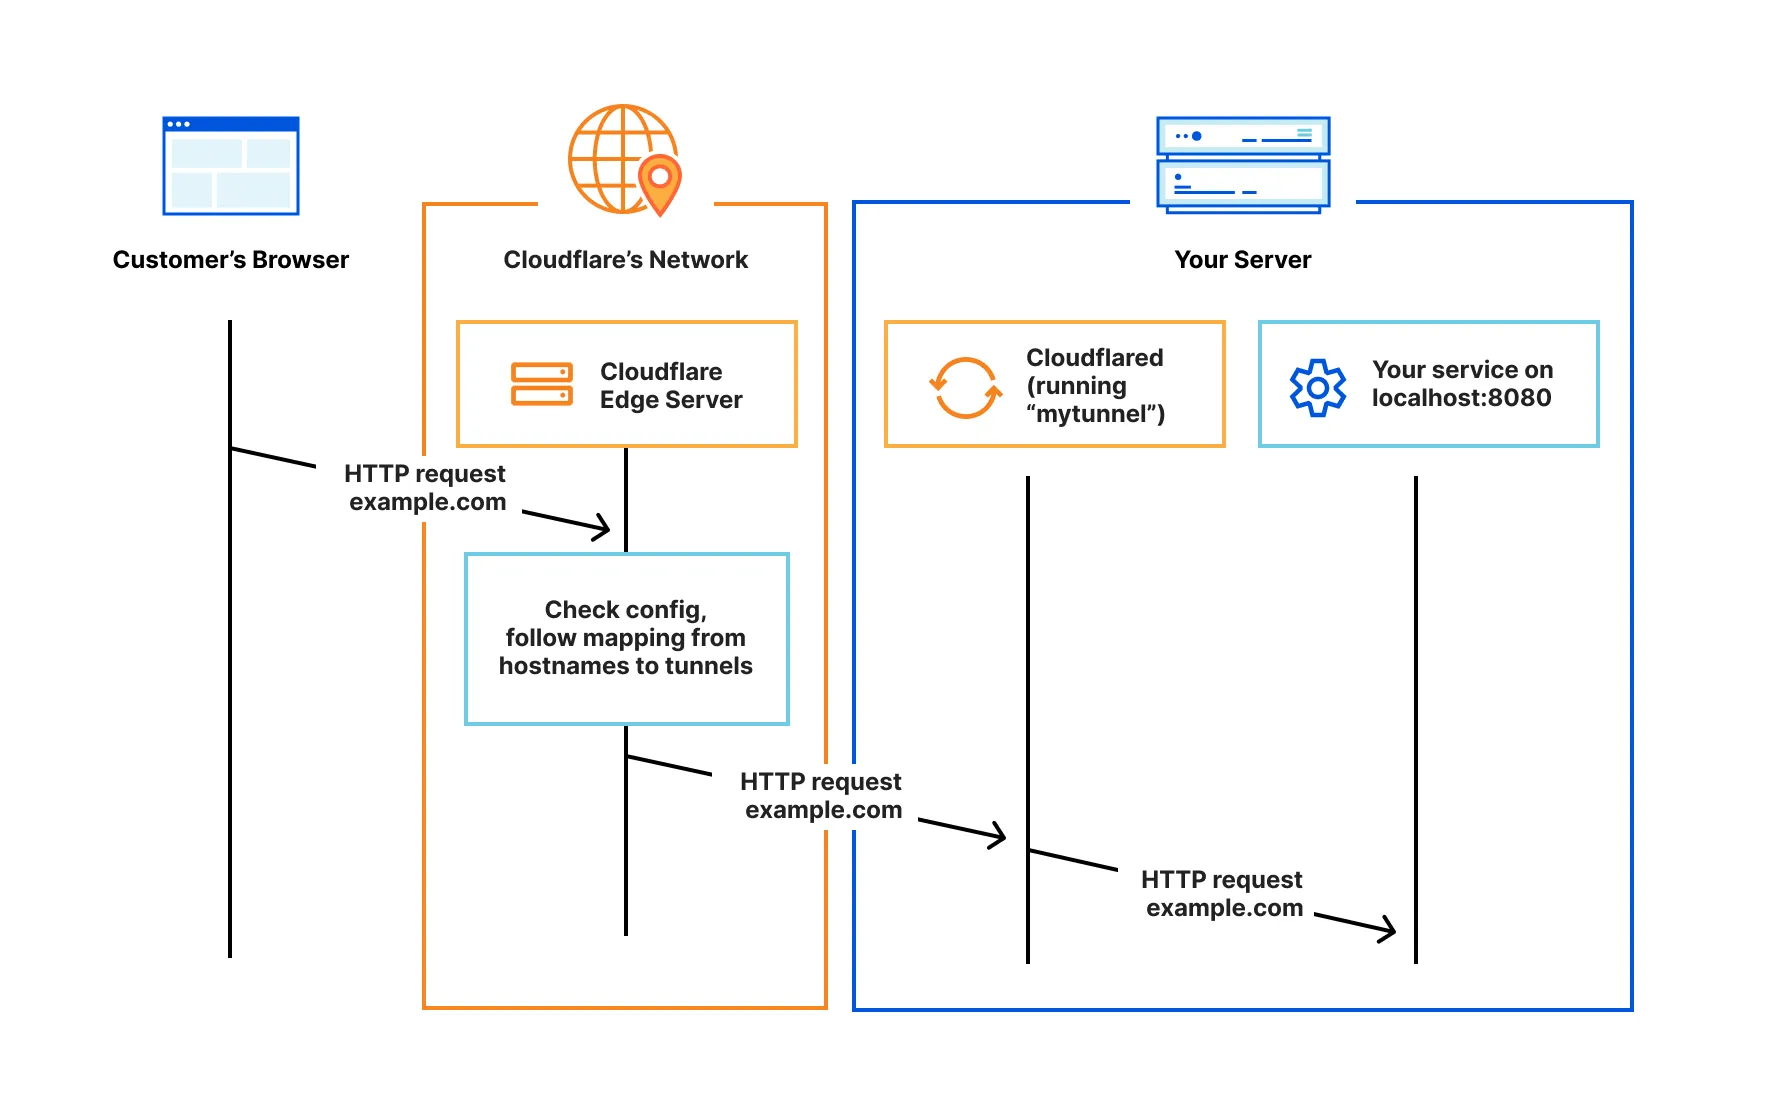
To enable clientless access to your applications, you will need to create a Cloudflare Tunnel that publishes applications to a domain on Cloudflare. A published application creates a public DNS record that routes traffic to a specific address, protocol, and port associated with a private application. For example, you can define a public hostname (mywebapp.example.com) to provide access to a web server running on https://localhost:8080. When a user goes to mywebapp.example.com in their browser, their request will first route to a Cloudflare data center where it is inspected against your configured security policies. Cloudflare will then forward validated requests down your tunnel to the web server.
To create a Cloudflare Tunnel:
-
Log in to the Cloudflare dashboard and go to Networking > Tunnels.
Go to Tunnels -
Select Create a tunnel.
-
Enter a name for your tunnel. We suggest choosing a name that reflects the type of resources you want to connect through this tunnel (for example,
enterprise-VPC-01). -
Select Create Tunnel.
-
Choose your operating system, then copy the installation command and run it in a terminal on your origin server.
-
Wait for the tunnel to connect. Once the connection is established, select Continue.
After creating your tunnel, add a published application route:
-
Go to Networking > Tunnels, then select your tunnel.
Go to Tunnels -
On the Routes tab, select Add route, then select Published application.
-
Enter a subdomain and select a Domain from the drop-down menu. Specify any subdomain or path information.
-
In Service URL, enter the protocol and address of your application (for example,
http://localhost:8000). Refer to supported protocols for available options. -
Select Save.
All users on the Internet can now connect to this application via its public hostname. In Module 4: Secure your applications, we will discuss how to restrict access to authorized users.
For more control over how traffic routes through your tunnel, refer to the following links: